Dewey's
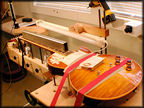
guitar in the "rack". (Dan's Neck-jig)
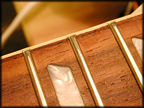

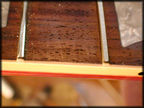
Some polished frets for Dewey.
|
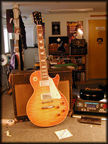
'59
Gibson Historic Les Paul
Fret Dress & Setup by Dan Erlewine |
|
Featuring
the Deweyburst
|
Click on Images to Enlarge
|
Dewey's
guitar in the "rack". (Dan's Neck-jig) |
|
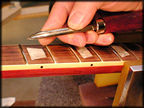
While leveling the frets with a dead-flat diamond bar, one fret is still shy by another stroke or two. |
|
When the frets are leveled, poor old Dan has to dress them all. It takes him a LONG time.. | |
We are rounding the frets, and bringing the leveled, flat spots to "center" where we will final-round . |
|
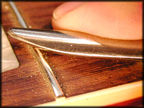
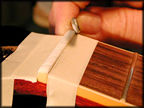
A new tool-I learned this from the great Tom Anderson (Anderson Guitarworks) is a burnisher for bringing the final flat, or "land" to a polish. The burnisher compresses the metal back into itself-eliminating in many cases the need for sanding the frets and buffing them. The burnisher can do it all (in the right hands). | |
The curved surface of the hardened-steel burnisher can roll over the profile of the fret as it brings that final land left by the leveling process to center and "pushes" any striated marks left by leveling back into the fret itself. It is awesome! |
|
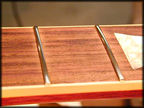
Some polished frets for Dewey. |
|||
 |
|||
|
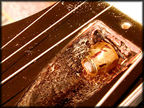
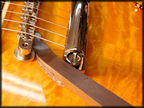
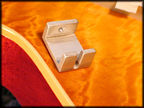
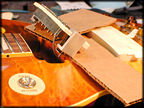
I didn't need to raise the bridge, however when I do I use this "bridge-jack" from the old Kalamazoo factory. It takes the load and lets the thumbwheels rotate freely, quickly. | 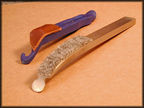 |
You can make your own "Kalamazoo Jack" from a bicycle tire lever (for removing the tire from the rim) with leather superglued to it. |
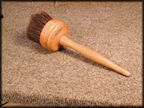 |
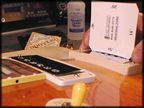
This
is a "bench brush" from the old Kalamazoo factory - used to brush shavings
from the bench top. At one time the bristles would have been three times
longer - it saw much use. I got from the auction when Gibson moved to
Nashville. |
 |
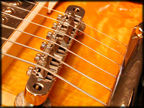
The bridge saddles looked like this after strobe-tuning. The A-string would never have intontated properly faced backwards, and the E-string woulda' had a time, too. |
|
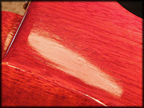
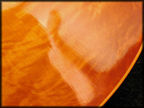
In
the refracted light you can see the thin finish and how it has already
shrunken into the sworled grain of the top - great look! |
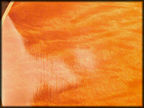 |
These length-wise marks are where the lacquer has shrunken and the factory buff-marks show as striations - another cool look. |
|
|
|||
 |
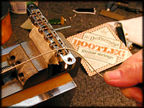
Here's
a little tool I made for loading Humbuckers into a mounting ring... |
 |
It holds the spring and lets you install the screw easily and without wrestling-this can be tricky on some guitars-especially a good looking babe like Dewey's got.. |
 |
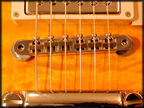
After seating the bridge saddles to the radius I chose to use (using nut files), I burnished the slots with the strings themselves..the two lower saddles are facing backwards (ala vintage Gibson), I changed that soon.. | 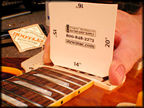 |
Dewey's fretboard radius was 12", but the bridge could not reach that radius without alot of deep saddle slotting. I went with 15" bridge saddle radius that was slightly flatter than the freboard itself. (Not a bad way to go as I see it). I set the neck polepieces at 14". |
 |
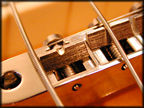
...and the bridge polepieces at 15" - the strings were gradually flattening as they went to the bridge. These polepieces are ZIG-ZAGGED, with the screwdriver slot going neither with the line of the strings or cross-wise to it (ala Gibson 1950s-it also gives more metal under the string to pickup the sound). OPINIONS ON THIS ARE WELCOMED! | 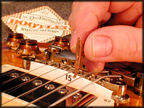 |
The bridge saddles are 15" (underneath the strings) |
. 
|
I turned the low E-and A-saddles forward-the spacing was dead center and allowed me to do it. I don't think it would have reached proper intonation without this. I don't like turning those two saddles "backwards" | 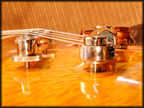 |
I set the tailpiece up off the top a bit.. |
 |
The only saddle I needed to groove somewhat deeply was the low-E. | 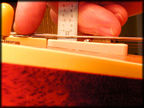 |
With the outside E-strings pressed down at the last fret....I set the outside E-polepieces to the factory specs of 3/32" on the neck pickup and 1/16" at the bridge. I will further adjust this by ear to balance the pickups to each other if I don't like what I hear. |
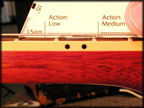 |
I set the action as low as I could get it-I can always raise it up. With a capo at the first fret to eliminate the nut height from the equation I set the Low-E to 3.5/64" and the treble E at 1/32". It played good right there (quite low, but tight-and with good tone). This tool was supposed to have been in my new book, but the die-cutter "couldn't cut it" (as he said he could). I am looking now for a LASER cutter to do the next printing of the book cuz I want the tool(s) in there! | 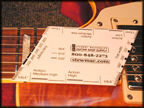 |
This is my cool measuring tool that wasn't! It measured fret height, fret width, string height, and gave quick action measurements of low, medium, medium-high etc. It read both Imperial and Metric. People would love it if the DIE-CUTTER could have produced what he promised. (We pulled it at the last second). |
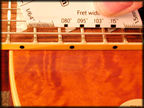 ...fret width markers... |
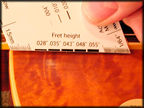 ...fret height graduations (strings removed-hold against fret)... |
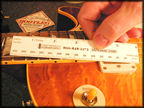 ...and even a 'lil rule... |
|
 |
... I spent some time removing all the sharp edges of the nut, lowered the top of the nut since I dropped the strings closer to the first fret, and polished it far more than Gibson did... |  |
Dewey's frets are done, and they look pretty good-but nothing like the beautiful wood on the top of his R9. |
 |
|||